


We learn from the Warsaw Whig of the 31st ult., that Dr. Wm C. Morris, formerly of Warrensburg (MO) in this State was drowned while attempting to ford the Osage River on horseback. Dr. Morris was 74 years of age, yet appeared to possess the vigor and health of a man of fifty. He was, says the Whig, surgeon in the Army, and then of the Navy of England, for forty years and was at the Battle of Trafalgar under Lord Nelson, besides being is some thirty or forty engagements.

Marlborough Express, Volume XLIX, Issue 253, 25 October 1915, Page 4
Battle of Trafalgar
The Battle of Trafalgar was fought on the 21st of October 1805 off Cape Trafalgar on the Spanish coast, between the combined fleets of Spain and France and the Royal Navy. It was the last great sea action of the period and its significance to the outcome of the war in Europe is still debated by historians. The Chase
The battle itself was the culmination of a long campaign. After the Treaty of Amiens Europe was at peace for 14 months. Many ships in the Royal Navy were paid off and the British returned to their peace time activities. But across the Channel in France Napoleon was planning the next stage of his domination of Europe. He realised that if war broke out again then the Royal Navy would blockade French and continental ports as they had done before and French overseas trade would be crippled. So he planned to invade England and free the seas for French trade. He ordered the building of a fleet of invasion barges and the Grand Army was moved to the Pas de Calais area.
But to get the army across safely the French fleet would need to control the English Channel. To this end he tried to engineer a meeting of his fleets so they could control the sea lanes, and protect his invasion barges. He gave orders for the fleets in Toulon, Brest and Ferrol to break out of their blockaded ports.
After an aborted attempt Admiral Villeneuve eventually managed to evade Nelson, blockading him in Toulon, and sailed for the West Indies on March 30th. According to Napoleons plan to meet up with Ganteaume ( who was blockaded in Brest ) , and then to sail back to Europe and with the Rochefort, Ferrol and Brest Squadrons 'procure our superiority before Boulogne for some days'.
When Nelson was told that the French fleet had sailed he assumed they were heading for Egypt, so he sent his ships off to the South East. When he discovered his mistake he set off in pursuit of Villeneuve. Villeneuve picked up Admiral Gravina and the Spanish fleet from Cadiz, and sailed for Martinique. 
Nelson discovered that Villeneuve had sailed out of the Med and resumed the chase on the 10th May across the Atlantic to the West Indies. Eventually following the French and Spanish fleet back again to Europe. Villeneuve waited for Ganteaume to join him. But Ganteaume failed to break the British blockade, so Villeneuve sailed back for Ferrol.
He encountered Calders squadron of 15 battleships off Cape Finisterre on 22nd of July. They fought an abortive action in poor visabilty. Calder captured two French ships, and several of the British ships were damaged. Calder failed to press home the action, for which he was severely criticized.
(After Calder joined up with Nelsons fleet he was allowed to sail back to England on the Prince of Wales in an attempt to clear his name at a court martial. The Prince of Wales was a powerful 98 gun ship, and Nelson could ill afford to lose it.) 
Villeneuve, unable to reach Ferrol, sailed for Cadiz, but bad weather forced him to to run into Vigo. From there Napoleon ordered him to sail for the Straits of Dover. Decres, the French chief minister of marine, whose confidence in the invasion project had never been high, wrote the orders, stating that Villeneuve was to sail for the Channel, unless the state of the fleet was such as to mitigate against this, in which case he was to sail to Cadiz.
On August the 13th the Combined Fleet of 29 battleships sailed westwards, Villeneuves' initial intention was unclear. But after picking up intelligence from passing merchantmen and sighting some British ships in the distance Villeneuve decided to head for Cadiz. He arrived there on August 20th.
Nelson arrived off Cadiz to join Collingwoods' fleet on September 28th and ordered his frigates, under Captain Blackwood, to watch Cadiz while he cruised 50 miles offshore with the rest of the fleet, hoping to draw the Combined Fleet out.

During the course of the summer Napoleon, despairing of bringing his fleets together, had abandoned his invasion plans for England and had turned his attention to Austria. The British had sent a small army under General Craig to Sicily to threaten Napoleons southern flank and to support the Russians. To try and guard Italy and his operations in Austria, Napoleon ordered Villeneuve to sail back into the Mediterranean. He had also decided to replace Villeneuve with Admiral Rosily . On September 27th Villeneuve received his orders to sail back into the Med for Naples, to support a landing of 4000 troops there. Troops designed to counter Craigs small force. The Battle
When Villeneuve decided to sail from Cadiz his plan was for Magon to sail out with his squadron first and capture or drive off the British frigates. On October 19th and a fair wind for leaving Cadiz blowing Villenueve hoisted the order for ships to sail, There was some confusion amongst the fleets captains over whether this order was just for Magon to sail, the frigates or the whole fleet. As the fleet set sail the breeze died away and only seven battle ships and three frigates made it out of the harbour. The wind was too light to let them chase off the British frigates. Villeneuve was forced to order the rest of the fleet to anchor for the night.
The British frigate Sirius (opens in a new window)made the signal 370, 'Enemy's ships are coming out of port', which was repeated along the chain of ships until it reached the main fleet. Nelson then signaled the fleet for 'general chase south-east', his plan was to steer for the Straits of Gibraltar and prevent the Combined Fleet from sailing into the Mediterranean.
On October 20th the rest of the Combined Fleet got under sail and set course for the south-east. Because Nelson had reacted quickly to the signal 370, the British fleet reached the entrance to the Strait before the French and Spanish fleet had left Cadiz. So the British fleet retraced its steps back to the north-west. The Nelson Touch
As the British Fleet had waited for the Combined Fleet to sail from Cadiz Nelson had asked his captains to come on board the Victory and had explained his plan of attack. The ships were to form two columns, with Nelson in command of one and Collingwood the other, and sail at the centre and rear of the enemy line of battle so as to bring the British ships into close action and cut off the van of the Combined Fleet, which would then take time to get back into the action. Nelson wrote a detailed memorandum explaining his plan on the 9th October, although this was not stricly adheared to in the battle. Nelson reported that his captains were pleased with this innovative plan. October 21st

British Line of Battle
Weather Column
Lee Column
Victory
Temeraire
Neptune
Leviathan
Conqueror
Agamemnon
Britannia
Ajax
Orion
Minotaur
Spartiate
Royal Sovereign
Bellisle
Colossus
Mars
Tonnant
Bellerophon
Achille
Polyphemus
Revenge
Swiftsure
Defence
Thunderer
Defiance
Prince
Dreadnought
Villeneuve sailed slowly in the light winds to the south-east. He had in fact guessed what form Nelsons attack would take, but had failed to specify any defence to his captains. The Combined Fleet sailed in a line with the Neptuno in the rear and the San Juan de Nepomuceno commanded by Commodore Churraca in the van. Admiral Gravina was in the Principe de Asturias and Admiral Villeneuve sailed in the Bucentaure. Gravinas' squadron of observation should have been sailing to windward of the Combined fleet , to come to the aid of any part of the line threatened by the British, but had in fact taken up station at the van.
Shortly after dawn the French frigate Hermione spotted the British fleet to windward in the west and signaled to Villeneuve. Villeneuve could have sailed on for Gibraltar, but instead deciding not to fight off a lee shore, he thought to try and return to Cadiz. So at 8 a.m. he ordered the fleet to wear, an order which was finally completed by 10 a.m. The Combined fleet now had to reform the line of battle, sailing in the opposite direction. The variable quality of the Combined Fleets crews now began to show, the ships found it difficult in the light wind to find their position in the line of battle, and the line sagged way to leeward in the middle. Villeneuve now saw that Gravinas' squadron was out of position and signalled him to keep to windward, but it was too late. The French and Spanish captains could clearly see the British ships advancing on the centre of their line in two columns, and some like Commodore Churruca realised the danger, that the van of the Combined Fleet would be cut off and out of the battle. Churruca thought that Villeneuve should order the leading ships to turn now and bear down on the British.
On board the Victory Nelson ordered Lieutenant Pasco to make a signal to the fleet "Mr Pasco, I wish to say to the Fleet 'England confides that every man will do his duty'". Pasco asked Nelson if he could substitute the word 'expects' for 'confides' as that was in the telegraphic vocabulary whereas confides would have to be spelt, Nelson agreed and the signal was run up Victorys' halyards. Changing the wording subtly changed the meaning, and the signal caused confusion on some ships, with sailors saying they would always do their duty and didn't have to be asked.
One final signal was run up on the flagship, the telegraphic flag and then numbers one and six 'Engage the enemy more closely'. List of signals made at Trafalgar.
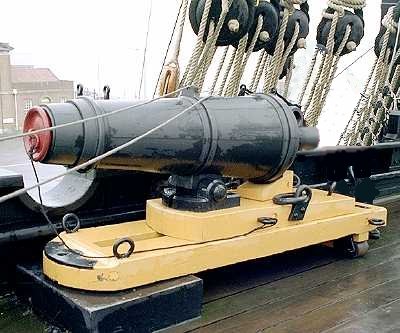
Soon after this the first shots were fired by the Combined fleet at the Royal Sovereign as she came within range of the Fougueux. The Royal Sovereign opened fire at 12 noon, and fifteen minutes later the first of the enemy ships opened fire on the Victory at long range. Close Action
As the Victory closed on the enemy line, Captain Hardy decided to take his ship past the rear of the Bucentaure. The enemy shot had already been cutting into the ship for some minutes and many men were already dead or wounded including Nelson's secretary, John Scott, and eight Marines stationed on the poop deck. Seeing this Nelson ordered the Captain of Marines, Charles Adair, to disperse his men about the ship, a far reaching order in that the Marines would have dealt with French sharpshooters, and perhaps saved Nelsons life.
Nelson seems to have been sure he was going to die in this battle, many times saying final farewells to friends and desperately trying to ensure that Lady Hamilton and his daughter Horatia would be looked after when he died. He certainly took no steps to avoid death, Captain Blackwood suggested he moved his flag to the Euryalus to direct the battle from there, but he refused. And several people were concerned that he was wearing his stars of honour on his coat, making him an obvious target.
On the fo'c'sle the Bosun William Willmet waited beside the larboard 68 pounder carronade, one of Victory's two 'smashers' as they were known. (Image of Victorys' 68 pounder carronade). It had been loaded with a round shot and a keg of 500 musket balls, and as Victory passed within touching distance of Bucentaure's stern, he fired the carronade into her, raking the French ship from end to end and mowing down the sailors manning their guns. As the Victory continued to sail past, her lower deck guns opened fire as one by one they came to bear.
As Victory cleared the French ship she came within range of the Neptune which fired her broadside into the Victory damaging the foremast and bowsprit. Hardy ordered the helm over to bring Victory alongside the Redoubtable which was on her starboard side, and as the guns came to bear she fired her starboard broadside into the French ship.
The Victory and the Redoubtable crashed together and their yards locked. Redoubtable shut most of her gunports to prevent boarding and the French marines in the rigging threw grenades and fired down onto the deck of the Victory. At about 1.15 pm as Nelson and Hardy walked on the quarter deck a musket ball fired from Redoubtable struck Nelson in the top of the shoulder and smashed into his spine. He knew straight away that the wound would be fatal, and as he was carried down to the orlop deck he covered his face with a handkerchief. As they reached the cockpit, wounded sailors waiting for treatment, recognising Nelson, called for the surgeon William Beatty.
Fighting continued on the decks above and as Redoubtable was bombarded by Victory 's guns the Temeraire closed on her starboard side and fired into her. The three ships locked together and the Redoubtable was slowly pounded into submission.
 |
| A rare eye-witness account on the greatest battle in British naval history, the Battle of Trafalgar |
At the head of the Lee column the Royal Sovereign had been engaging the Santa Ana and the Fougueux for some 30 minutes alone, having sailed into the enemy line well ahead of the rest of the division. Collingwood had ordered the Lee column to form on the larboard line of bearing, so his ships were not in line like Nelsons but approaching on a broad front (see main diagram) . At this end of the Combined Fleets line of battle the ships were closed up in a loose formation, not in a line. As the other ships of Collingwoods line joined the battle they were presented with a confused array of ships.
The battle continued in the dying wind and, as their masts and sails were shot away, the ships of both fleets drifted slowly about each other, looking for targets through the clouds of smoke. The Mars lost most of her sails and rigging and swung uncontrollably in the swell. Captain Duff, leaning over the side to try and spot the enemy ships was decapitated by a round shot, and the Mars was raked by several French ships including the Pluton.
Two hours after the start of the battle, the Combined fleets van under Admiral Dumanoir finally wore or tacked and made back for the battle. Four ships, including DumanoirsFormidable sailed to windward of the British and exchanged shots with them as they passed, then sailed away from the battle. Three ships sailed straight for Cadiz and only theIntrepide and the Neptuno sailed to Villeneuves aid. The Intrepide was engaged by several British ships, and was singled out for her bravery in the face of overwhelming odds by several of the British captains.
Slowly the British ships gained the upper hand as one by one the ships of the Combined Fleet struck their colours or sailed away from the battle. Captain Hardy reported to Nelson that the battle was won, 'Thank God I have done my duty', were his last words, and he died at 4.30pm. Aftermath
The gloss of the victory was taken off for the British ships with the news of Nelsons death. It is hard now to appreciate the effect of this news on the ships crews and on the nation as a whole, although Nelson is still regarded as a national hero in Britain, in 1805 he was THE national hero, and to lose him at the moment of his greatest victory was a bitter blow.
Nelson himself would have been bitter had he known the treatment his beloved Lady Hamilton and his daughter would get from a grateful nation. They were almost completely ignored. Instead the country decided to make Nelson's brother, William, an earl, and voted him £99,000 with an annual pension of £5,000 a year. Frances, still formally Nelson's wife, was granted £2,000 a year. Emma and Horatia got nothing. Without the pension from a grateful nation that Nelson had foreseen for her, and always famous for her extravagance, Emma eventually sank into poverty, even spending some time in prison for debt. After her release she went to live with Horatia in Calais and died there in January 1815.
Of the Combined Fleet, Bucentaure, Algeciras, Swiftsure, Intrepide, Aigle, Berwick, Achille, Redoubtable, Fougueux ( French), Santissima Trinidad, Santa Anna, Argonauta, Bahama, San Augustino, San Ildefonso, San Juan de Nepomuceno, and Monarca ( Spanish) were taken by the British. Redoubtable sank, Achille blew up, San Augustino and Intrepide burned, the British scuttled Santissima Trinidad and Argonauta, and in the gale that followed the battle Monarca, Fougueux, Aigle, and Berwick were wrecked. 
On the 23rd of October a sortie by French Commodore Julien Cosmao from Cadiz with Pluton, Indomptable, Neptuno, Rayo, and San Francisco de Asis attempted to recapture some of the British prizes. Santa Anna and Algeciras were recovered, but Neptuno, Indomptable, and San Francisco de Asis were wrecked and Rayo was taken by the Donegal and then wrecked.
On the 3rd of November, Admiral Strachan, with Caesar 80, Hero 74, Courageux 74, Namur 74, and four frigates defeated and captured the force of four French ships which had escaped at Trafalgar under Dumanoir: Formidable 80, Duguay-Trouin 74, Mont Blanc 74, and Scipion 74. All four are taken into the Royal Navy, with Formidable renamed Brave,Duguay-Trouin renamed Implacable, and the other two keeping their names. The Victory was towed into Gibraltar her masts and sails shot to pieces. The casualties were high, as might be expected in such a close fought action. The British lost 449 men killed and 1241 wounded (some of whom subsequently died), the French and Spanish fleets lost 4408 men killed and 2545 wounded, ( figures are from Lewis 'A Social History of the Navy').
The ultimate outcome of the victory was to secure the supremacy of the British navy on the high seas for the next hundred years, and the end to any threat of invasion from France. It lead Napoleon to his Continental strategy, and possibly to his disastrous campaign against the Russians in 1812. Battle of Trafalgar Casualty List
Ship Guns Commander Killed/Wounded
Victory
100
Capt. Thomas Masterman Hardy
57/102
Temeraire
98
Capt. Eliab Harvey
47/76
Neptune
98
Capt Thomas Francis Freemantle
10/34
Leviathan
74
Capt Henry William Bayntun
4/22
Britannia
100
Capt Charles Bullen
10/42
Conquerer
74
Capt Israel Pellew
3/9
Africa
64
Capt Henry Digby
18/44
Agamemnon
64
Capt Sir Edward Berry
2/8
Ajax
74
Lieut John Pilford
2/9
Orion
74
Capt Edward Codrington
1/23
Minotaur
74
Capt Charles John Moore Mansfield
3/22
Spartiate
74
Capt Sir Francis Laforey
3/20
Royal Sovereign
100
Capt Edward Rotheram
47/94
Belleisle
74
Capt William Hargood
33/93
Mars
74
Capt George Duff
29/69
Tonnant
80
Capt Charles Tyler
26/50
Bellerophon
74
Capt John Cooke
27/123
Colossus
74
Capt James Nichol Morris
46/160
Achille
74
Capt Richard King
13/59
Dreadnought
98
Capt John Conn
7/26
Polyphemus
64
Capt Robert Redmill
2/4
Revenge
74
Capt Robert Moorsom
28/51
Swiftsure
74
Capt William Gordon Rutherford
9/8
Defiance
74
Capt Philip Charles Durham
17/53
Thunderer
74
Lieut John Stockham
4/12
Defence
74
Capt George Hope
7/29
Prince
98
Capt Richard Grindall
Euryalis
36
Capt Hon Henry Blackwood
Naiad
38
Capt Thomas Dundas
Phoebe
36
Capt Hon Thomas Bladen Capell
Sirius
36
Capt William Prowse
Pickle
10
Lieut John Richards La Penotiere
Entreprenante
8
Lieut Robert Benjamin Young

Surgery "Tools" of Dr. W. C. Morris, Trent, England 1805 (Warrensburg, MO)

SURGICAL INSTRUMENTS: BATTLE OF TRAFALGAR
Following the outbreak of war several committees were formed to raise funds for the war effort. The members of the Grand Lodge of Freemasons of New Zealand formed a fundraising committee. The Freemasons were initially a guild set up as a way for professional stonemasons to protect trade secrets and ensure that the secrets were only passed on to worthy apprentices.
The need for stonemasons declined in the seventeenth century when people stopped building large stone castles and cathedrals. As a result, the Freemasons shifted their focus towards fraternity and charity work; opening up membership to non-stonemasons. The movement grew in popularity after the opening of the first Grand Lodge in 1717 and spread from England across the globe, reaching New Zealand in the early nineteenth century. In early 1916 the Freemasons established the Masonic War Fund with a goal of collecting ₤10,000 which was intended to help wounded soldiers and the families of service men killed in action. After hearing about the fund, Dr Redman of Picton, New Zealand offered the Freemasons a set of nineteenth century surgical instruments for auction.
The tools had once belonged to Dr W C Morris of Newton on Trent, England (later Warrensburg, Missouri USA) and saw their first battle in 1805 on board a war ship involved in the Battle of Trafalgar. The kit went on to be used until 1834 and saw service in over 100 battles. Dr Morris passed them on to an acquaintance for safekeeping in 1834. Details of the kit’s path between 1834 and 1916 are unknown, but sometime in this period Dr Redman inherited the set. The Grand Lodge auctioned the set off through the Art Union raising ₤558 towards the Masonic War Fund. Raffled items typically went to the highest bidder but Dr Redman had stipulated that the instruments were to be donated to Canterbury Museum after the money was raised. It seems fitting that tools originally used to help those wounded in battle were able to help another generation of war wounded men over a century later.
No comments:
Post a Comment